Lend to non-OCLC libraries
Select whether you are using the Legacy interface or the Modernized interface in Tipasa.
Manually create lending requests for non-OCLC libraries
This documentation explains how to accept and fulfill lending requests from non-OCLC libraries.
Before you begin, make sure that Document Delivery queues have been set up in OCLC Service Configuration.
In order to lend an item to a non-OCLC library, you will need to create a user account in Tipasa to represent the borrowing library in order to track the item. You will need to do this for any non-OCLC library that borrows from you, but you will only need to create the patron record once. If an account already exists for the borrowing library, proceed with creating the request and applying bibliographic data.
Create a patron record for the non-OCLC library
- In Tipasa, navigate to the Admin tab.
- Select New user on the left side.
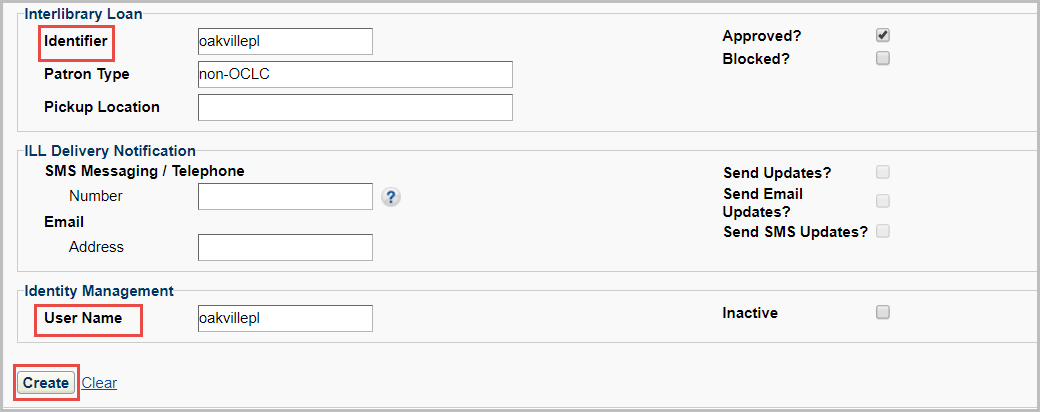
- Fill out the patron record form. Provide a name and a correct email.
- OCLC recommends using the library's name in the Last Name and User Name fields. Even if the library will never log in to My Account, you will need to supply a username in the username field near the bottom of the record. You can use that same value as the Interlibrary Loan Identifier. You may also wish to add a Patron Type that indicates the patron is a non-OCLC library. If your library requires approvals, make sure to click the Approved? checkbox.
Note: If your library uses WorldShare Circulation, you will also need to supply information for the Circulation fields. If you do not use WorldShare Circulation, leave all fields in the Circulation section blank.
- OCLC recommends using the library's name in the Last Name and User Name fields. Even if the library will never log in to My Account, you will need to supply a username in the username field near the bottom of the record. You can use that same value as the Interlibrary Loan Identifier. You may also wish to add a Patron Type that indicates the patron is a non-OCLC library. If your library requires approvals, make sure to click the Approved? checkbox.
- Click Create. A message window appears, "User was successfully created." Click OK. The new patron record screen displays.
Create the request and apply bibliographic data
- Create a new request using Document Delivery.
- On the new request screen, open the Patron accordion and enter the name of the library in the Name field.
- Click the magnifying glass to search for the patron information.
- Select the library name from the search results. The patron screen will display.
- Click Apply Patron Data to ILL Request NEW. The patron data will be applied to the new request.

- Click Save for Review. The request is assigned a request number. To view the request detail, click on the request number.
- The request will move to the Document Delivery queue.
- (Optional) Use Advanced Lending queues to manage your workflow.
- When you are ready to close the request, click Mark as Complete.
Mark the request complete when you ship it and track it in your circulation system, or keep the request open until the borrowing library returns it.
Tracking the Request
Apply tags to the request to track the due date. Enter your desired tags into the Request Tags field.
![]()
Once an item has been tagged, you will be able to choose that tag from your list of tags on the Tipasa landing page and retrieve a list of all requests sharing that tag.

For more information on using tags in requests, see Manage tags.
Provide non-OCLC libraries access to My Account
To allow non-OCLC libraries access to their patron account in My Account, the library will need login credentials.
Basic authentication
If using basic authentication:
- Create an account for the non-OCLC library using the Admin tab.
- Once the patron record is created, click the Set/Reset Password link for the library to setup their password in Tipasa.
The library will be able to access My Account.
Third-party authentication
The options for providing access to a non-OCLC library while using a third-party authentication system with Tipasa:
- Your IT department should create a valid account in your third-party system for the non-OCLC library to use. Include the lending library's patron record in your next patron load. Please see Patron data files for more information.
OR
- Contact OCLC Support to setup multiple identity providers for your Tipasa site.
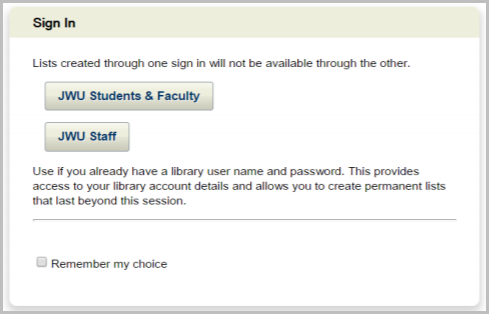
- All users will first encounter a landing page where they will need to click a button corresponding with their affiliation.
- Once the landing page is configured, create a patron record for the non-OCLC library using the Admin tab. Click the Set/Reset Password link to send the library a link to setup their password in Tipasa.
- All users will first encounter a landing page where they will need to click a button corresponding with their affiliation.

