Manage Tags
Tags are custom labels that can be applied to active and closed requests. Your library can use tags as a way to group and keep track of requests. For example, enter a tag such as "Invoice" to keep track of borrowing libraries and patrons to whom you have sent invoices. Use the tag to retrieve these requests and follow up with the borrower when needed.
Tags are only visible to your library. The system maintains all tags created and saved to a request, and you can search for active and closed requests using tags. You can create up to 200 unique tags.
Note: The tags added to requests in Tipasa are shown on the home page when they are attached to an active request. When the request is closed, the number behind the tag might go down, sometimes even to zero. This does not mean the tag has disappeared or has been deleted but shows that there is no active request with that specific tag.
Add a tag to a request
You can create new tags by adding and saving them to a request, or you can add existing tags to a request.
Note: You can only create up to 200 unique tags.
To create a new tag and add it to a request:
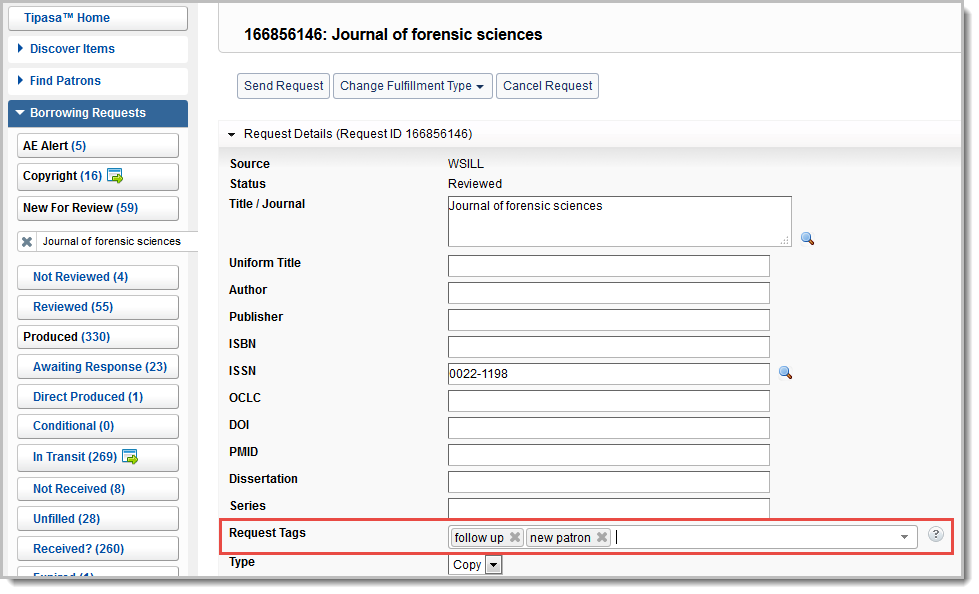
- Open the request you want to tag.
- In the Request Details, in the Request Tags field, enter one or more new tags.
- Click the text in the list or press <Enter> to add the tag to the request.
- Click Save.
To add an existing tag to a request:
- Open the request you want to tag.
- In the Request Details, in the Request Tags field, type the tag into the field or select the tag from the list. If you type into the field to find the tag, the system will match your text to the first characters of the tag.
- Click the text in the list or press <Enter> to add the tag to the request.
- Click Save.
Automatically tag new borrowing requests:
Add request tags to main automations to automatically apply tags to requests that match specific criteria. See Automated Request Manager for more information about automations.
- From the Automated Request Manager section of the WorldShare ILL module of the OCLC Service Configuration:
- Click + Add New to create a new automation or select the Edit button associated with an existing automation.
- For new automations, enter a Name and assign a Priority. See Main Automation fields for more information.
- Select any desired match criteria from the Matches drop-down menu. See Automation Match criteria for more information.
- If you do not select a match criteria, the automation will apply to all requests.
- Click the
 Add a match button to configure additional match criteria.
- From the Action drop-down, select Add Request Tags.
- Enter the desired tag(s) to be applied to requests matching the specified criteria.
- Click Save.
Edit or Delete a tag
Edit a tag
You can edit active tags. If you made a mistake and need to change the name of the tag, you can edit it on the Tipasa Home.
Note: Before you edit a tag, you should refresh the tag list to make sure the list is current. You will receive an error if you are not working from the most up to date version of the tag list.
To edit a tag:
- On the Tipasa Home, click the Manage all tags link.
- Click Refresh List to make sure the tags list is displaying the most current version.
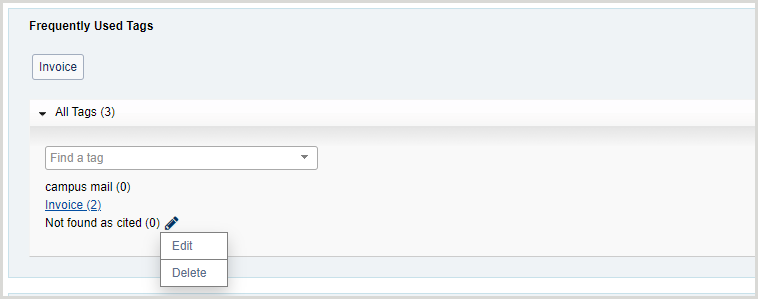
- Locate the tag you want to edit. You can search for the tag in the Search tags box, or find the tag in the list.
- Click the pencil icon next to the tag you want to edit.
- In the Tag name field, edit the tag. If you are renaming the tag, you can only use a phrase that has not been used yet.
- Click Done.
- The tag is updated and sorted in the tag list in alphabetical order.
Delete a tag
You can delete active tags and tags that are no longer associated with any active requests. You may want to delete a tag if you no longer use it.
When you delete a tag:
- It is removed from all requests.
- It is removed from the tags list under the All Tags accordion.
- It does not appear as a suggestion when you add a tag to a request.
Note: Before you delete a tag, you should refresh the tag list to make sure the list is current. You will receive an error if you are not working from the most up to date version of the tag list.
To delete a tag:
- On the Tipasa Home, click the Manage all tags link.
- Click Refresh List to make sure the tags list is displaying the most current tags.
- Locate the tag you want to delete. You can search for the tag in the Search tags box, or find the tag in the list.
- Click the Delete icon next to the tag you want to delete.
- On the Delete Tag window, click Delete.
- The tag is deleted and removed from the tag list.