Patron registration
Patron Registration allows staff to add and retrieve patron records as well as view and modify existing patron information including:
- General Patron information (identification, delivery and messaging information)
- Statistical information
- Billing information
- Login information (to allow the patron to login to the Relais web form)
Patron Registration allows staff to manually enter requests on behalf of patrons using:
- Request Book
- Request Article
Review or view a patron record
To retrieve an existing patron record:
- Login to Patron Registration.
- The search can also be done from Patron Statistical Information, Patron Billing Information and Patron Login Information.
- Enter any of the following search criteria
- Patron's last name
- Patrons last name AND first name
- Patron ID
- Patron's last name AND Patron ID
- Patron's first name AND Patron ID
- Patron's last name AND first name AND Patron ID
- Phone number
Note:
- When entering the last name or first name as search criteria, truncation can be used. For example, MACKEIG%
- Truncation cannot be used when searching the Patron ID or for the Surname when a First Name is entered.
- When searching first and last names, lower case characters are converted to upper case.
-
Hit Enter or click Search.
- If no match is found a pop up is displayed: Record is Not Found. Click Ok to return to Patron Registration.
- If an exact match is found the patron record is displayed.
- If multiple records are found, a list of patron names (both surname and first name) is displayed in a drop down list. The number of records found is displayed to the right of the list. Select the record you want to display.
- A maximum of 50 records can be retrieved and displayed at one time. More specific search criteria must be used if this limit is reached.
Note: In a shared system, only patrons that have the same library symbol associated with the staff Login ID are retrieved.
Select Clear to clear the current search criteria or the patron record currently displayed.
Add a patron record
To add a patron record
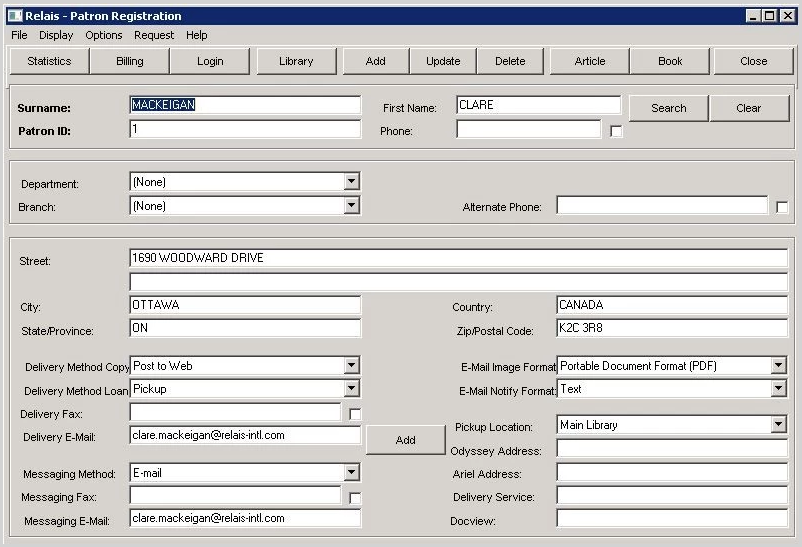
- Login to Patron Registration.
- Check to see if a patron record already exists.
- If no record exists enter the information as described below.
- Click Add.
- Once the patron record is added, additional details and information can be added to the record: Statistical Information, Billing Information and Login Information.
Patron Statistical Information
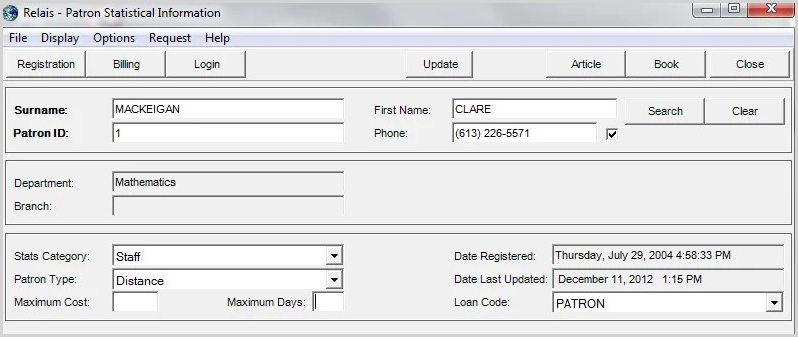
Once the patron record is displayed, you can add statistical Information.
- Select Statistics.
- Enter the following information.
- Click Update.
Patron Billing Information
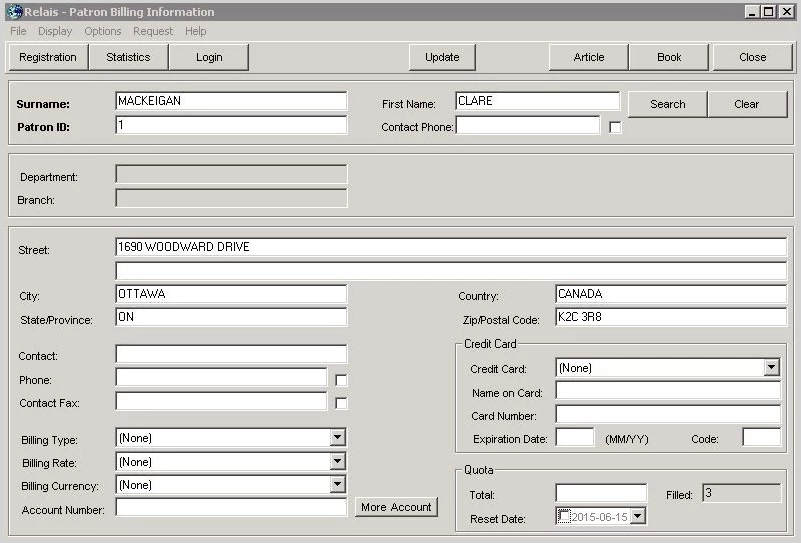
Once the patron record is displayed, you can add billing information.
- Select Statistics.
- Enter the following information.
- Click Update.
Modify a patron record
- Login to Patron Registration.
- Retrieve the patron record to be modified.
- Make the changes as required.
- It is not possible to update the Patron ID for an existing record. If the patron's ID changes, a new record must be created.
- Click Update.
Delete a patron record
Note: Only patron records to which there are no requests attached can be deleted.
- Login to Patron Registration.
- Retrieve the patron record to be deleted.
- Click Delete.
Patron login
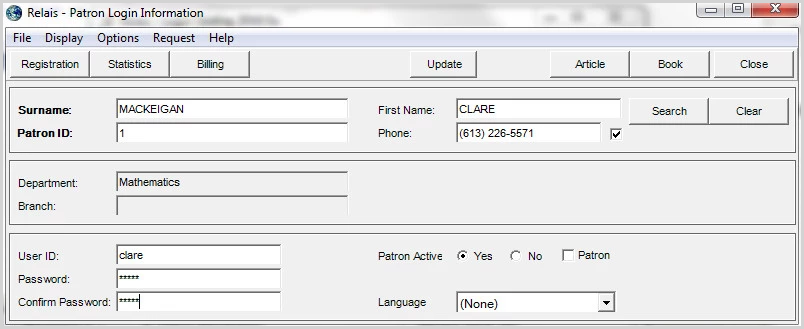
To createa a login/password for a patron:
- Login to Patron Registration.
- Retrieve the patron record.
- Click Login.
- Enter the User ID.
- Enter the password.
- Confirm the password.
- Click Update.
Note: If your library uses the Patron Load to create and update patron records or uses NCIP, you should not use Patron Registration to add or update patrons records since it may result in conflicting patron data. See Patron load for more information.
Inactive patrons
If patrons are considered inactive and access to ILL services has been removed, the patron record can be updated to reflect this and to prevent requests from being submitted.
Set a patron inactive
- Login to Patron Registration.
- Retrieve the patron record.
- Click Login.
- Set Patron Active = No.
- Click Update.
If an inactive patron tries to login to the Relais web form, the following message is displayed:
Your account is currently inactive.
You may not submit any new requests.
If a staff member tries to enter a request for an inactive patron, the following message is displayed: This patron is currently inactive. Requests may only be placed for active patrons.
Set a patron active
- Login to Patron Registration.
- Retrieve the patron record.
- Click Login.
- Set Patron Active = Yes.
- Click Update.
Configure Patron Registration
Extensive configuration of the screens used for Patron Registration is possible.
This includes the following elements:
- Screen name
- Names and hot keys for menu options
- Button names and hot keys
- Tool tips
- Field labels
- Default values for drop down boxes.
This configuration is managed through a text file ....\relais\patron.cfg
For assistance with configuring any of the elements of the Patron Registration please contact OCLC Support.