Create address label reports
Learn to create address label reports in Amlib.
Most address label reports require the loading of a customised spine label. The following guide takes you through the entire process for loading the customised template, creating a new report and running the report.
Save the Template
- Save the template into the Amlib/Reports folder on the Amlib server. This will make the template available for use for all users. Alternatively, you may save it into a local folder on your PC – but please be aware, that the template (once loaded) will only be available for use on that PC.
- Ensure that the template is saved with a name that clearly identifies it as a customised address label – for example: MPADLABL.QRP
Load the Template
- Launch the Amlib client.
- Go to Main > Reports > RepBorrower - the Borrower Reports screen will open.
- From the main menu, select Application > RepAddNew.
- The Report Files window will open – ensure that the Report Entity = Borrower
- Click the F1 New button – the Report File window will open:
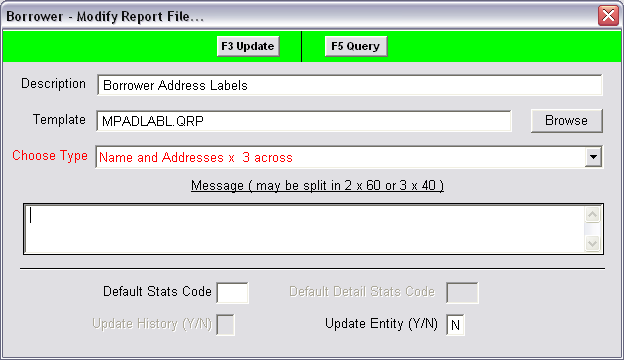
- Type in a Description – for example: Borrower Address Label
- Click on the Browse button and navigate to the Amlib/Reports folder on your Amlib Server and locate the template to be loaded (if the template has been loaded onto your PC – then navigate to the local folder)
- Select the file and then click on the Open button.
- Choose Type = Name and Addresses x 3 across
- You can leave Default Stats Code blank.
- Update Entity (Y/N) = N
- Click the F3 Update button to save the new template.
- Close out of the Report Files window.
The template is now loaded and available for use in a Report.
Create the Report
- Launch the Amlib client.
- Go to Main > Reports > RepBorrower - the Borrower Reports screen will open.
- Click the F1 New button.
- Locate the template you just loaded via RepAddNew, highlight it and click on the Select button.
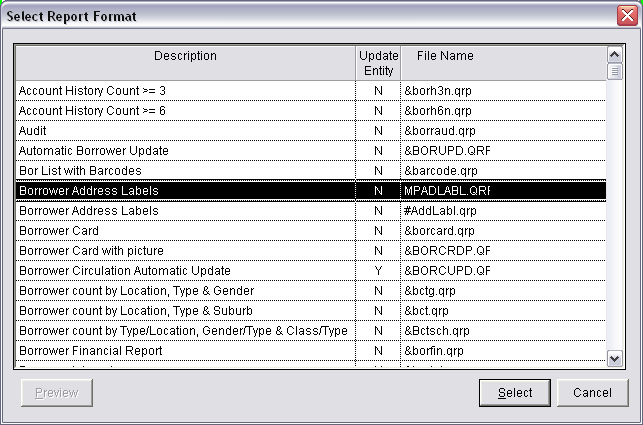
- You will be returned to the Borrower Reports screen – locate the report you just created and highlight it (the entry will be in bolded red and the Report Type = the Report Description of the template you loaded)

- Type in a Report Description – for example: Mornington Address Labels
- Click the F3 Save button.
Once saved the line will be bolded red as the report does not have a F7 Where search. At this stage add in your Where search as normal.
Run the Address Label Report
- Go to Main > Reports > RepBorrower – the Borrower Reports screen will open.
- Locate the report you created as part of the Create a Report procedure above and highlight it.
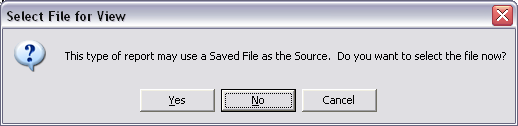
- Click the F8 View button.
- Click No to the pop-up:
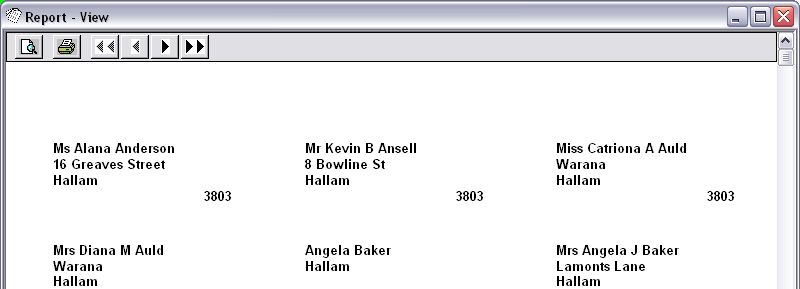
- A Report - View screen will now appear which you can print from: