Account or overdue history - more than 3 to six accounts
Borrower history - more than 3/6 accounts
It is possible to check the number of Accounts a Borrower has had over a period of time.
It is essential to get these reports that the Overdues and Accounts has the Update History Column set to Y and that the Reports are run via the F6 Print Button via the Report Scheduler.
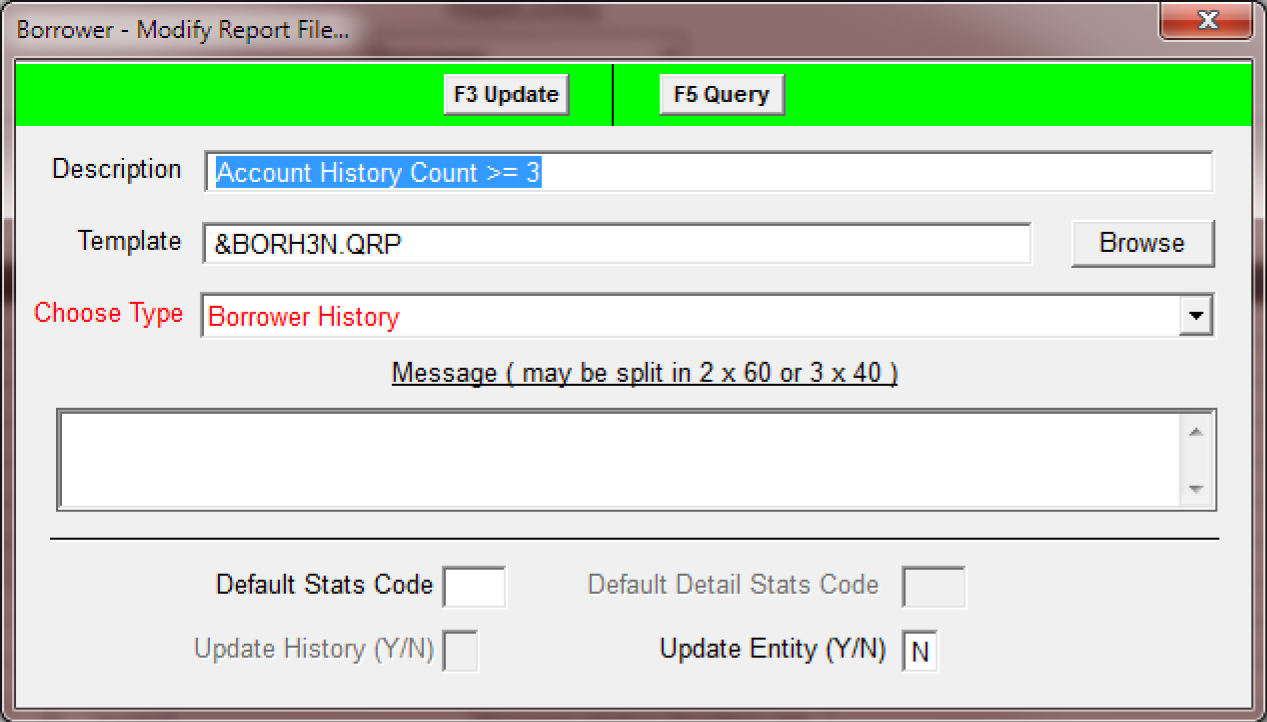
Borrower history - more than 3 accounts (&borh3n.qrp)
Borrower History Account Count – lists any Borrower who has had more than 3 Accounts in the Time
Period set in the Where parameters using History Date and History Type etc.
&borh6n.qpr Borrower History Account Count – lists any Borrower who has had more than 6
Accounts in the Time Period set in the Where parameters using History Date and History Type etc.

Load/check the template type
- Launch the Amlib client.
- Go to Main > Reports > RepAddNew.
- The Report Files window will open.
- From the Report Entity drop-down, select the Report Screen (module) you would like to load a template for – for example: Borrower
- Highlight the Account history report (&borh3n.qrp)line and click the F2 Modify button – the Borrower Modify Report File window will open
(To load a new report template: click the F1 New button instead). - Type in a Description – for example: Account History Count
- Choose Type: – ensure that Borrower History is selected.
- You can leave Default Stats Code blank
- Update Entity (Y/N) = N
- Click the F3 Update button.
- Close out of the Report Files window
The template is now loaded and available for use in a Report.
Create report
- Go to Main > Reports > RepBorrower.
- Select F1 New – the Select Report Format screen will appear.
- Highlight the account History report template you would like to use – Account History Count > 3 (&borh3n.qrp)
- Click the Select button.
- Type in a Description – for example: Overdue History Count > 3 Issues
- Ensure the Update Entity (Y/N) column is set to N.
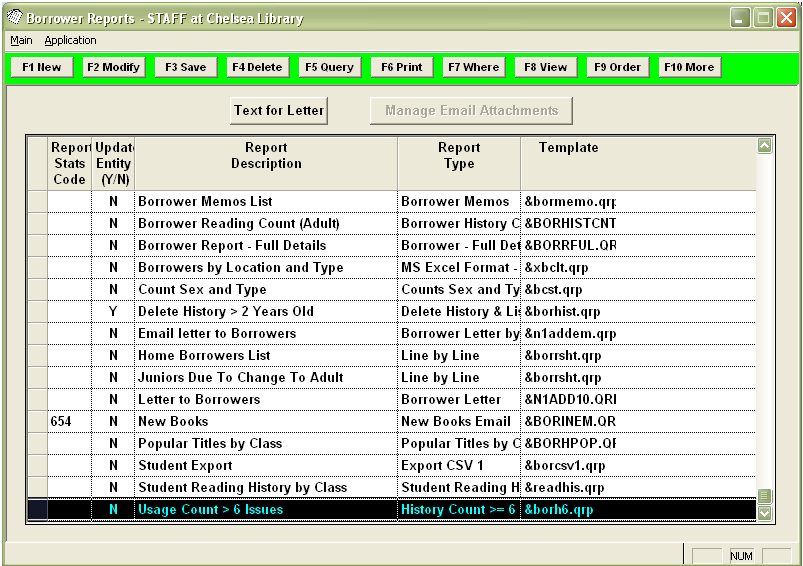
- Click F3 Save.
Where search parameters
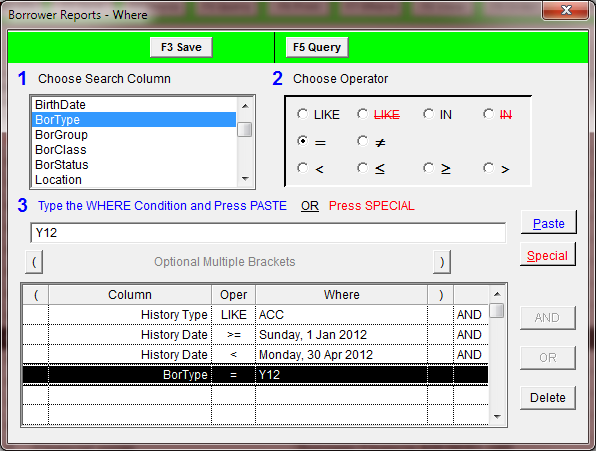
- Highlight the report and select the F7 Where button – the Borrower Reports – Where screen will open.
- Enter the following Where search:
- History Type LIKE OV (or = OVERDUE) to get the Overdue History
- OR History Type LIKE ACC (or = ACCOUNT) to get the Account History
(Use the Paste button to insert the parameter into the list at the bottom of the screen) - Enter a start date: History Date >= enter a date in DD/MM/YYYY format – for example: 01/01/2012
- Enter a finish date: History Date <= enter a date in DD/MM/YYYY format – for example: 10/10/2012
(a finish date is optional – if not inserted, the report will go up to the current date). - You may want to add other restrictors – for example: Borrower No = , or Borrower Class or Type etc.
3. Click the F3 Save button when complete – this will close the Borrower Reports – Where screen and return you to the Borrower Reports screen.
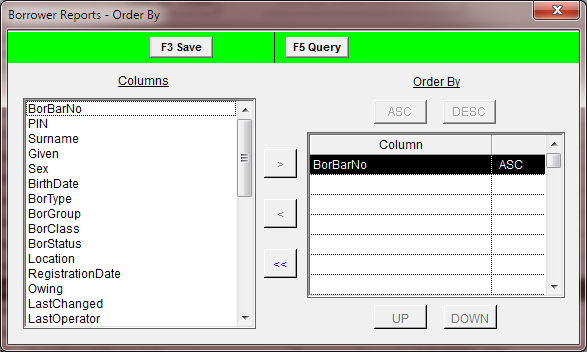
Order by parameters
- Click the F9 Order button – the Borrower Reports – Order By screen will open.
- Select BorBarNo from the Columns list and arrow it across into the Order By list
- Click the F3 Save button when complete – this will close the Borrower Reports – Order By screen and return you to the Borrower Reports screen.
View/print report
- Highlight the report you wish to run and select the F8 View button.
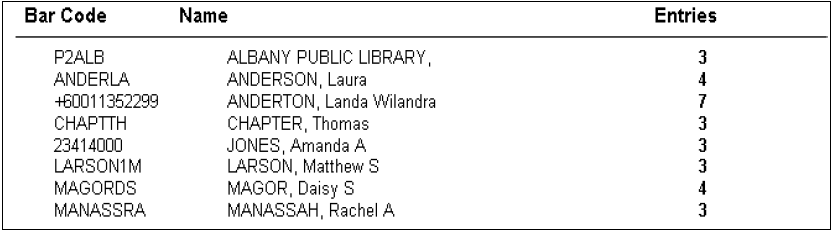
- The following message will appear:
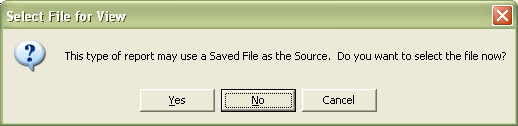
- If you would like the report to run using the entire database (rather than a Saved List) then select No.
- The report will then display:
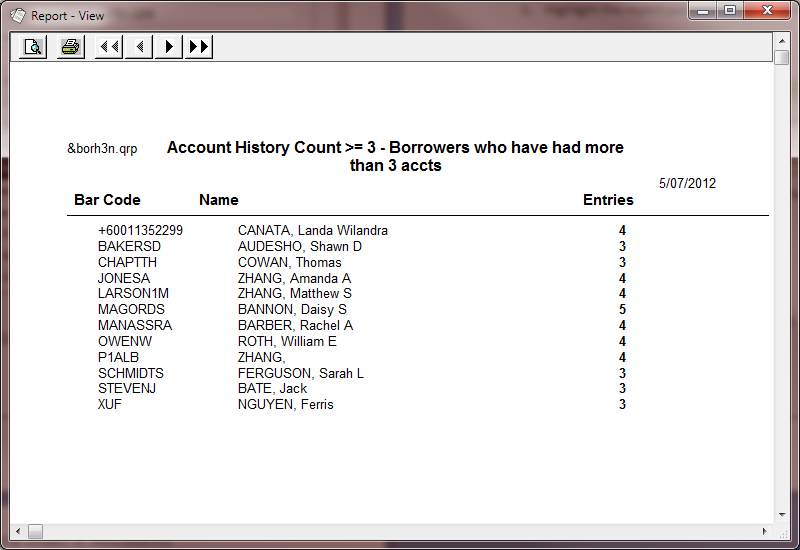
- Select the print button to print the report.