Print reports using the scheduler
Overview
Using the Report Scheduler has two benefits over running reports via the F8 View button:
- It allows you to schedule regularly run reports so that staff do not have to do it manually each time.
- It allows for further functions as part of the report such as updating Borrower/Stockitem history, creating financial accounts, changing records in the database and adding report information to your statistics.
- Email and SMS reports MUST be run via the Scheduler.
This guide will take you through setting up a report to use RepStartSchedule.
Step 1: Start the scheduler
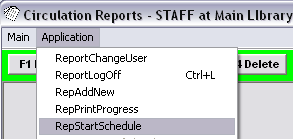
- From any Report screen (Main > Reports), select Application > RepStartSchedule. The Report Scheduler screen will then open.
- Select your Printing options: Printing, Email and/or Save to File.
- Select If a report is scheduled by another user do you still want to print it? = Yes/No.

- Click OK.
- After clicking OK, if you go back into the Application menu you will see that RepStartSchedule is now greyed out with a tick next to it – this indicates that the Report Scheduler is now running.

Note: If you need to restart the scheduler at any point, you will need to log out of all Report screens (Ctrl + L) and start at the beginning of these instructions.
Step 2: Check the report
Before scheduling any of your reports to run, it is a good idea to check out the setup of it and ensure that it’s going to do what you want.
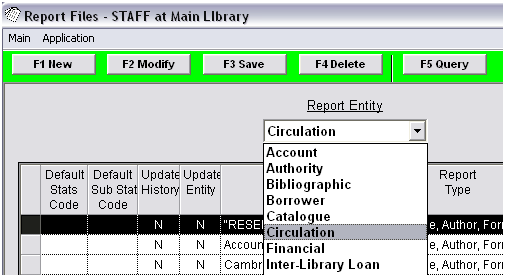
- Begin by going into Application > RepAddNew from any Report screen.
- From the Report Entity drop-down selecting the module you’re running the report for – for example: Circulation, Reservations or Stockitem.
- Find the report template you wish to be using for your scheduled report, highlight it and click the F2 Modify button to view the setup of the report.
- Check the Choose Type setting of your Report.
- Depending on the type of the report you are running, you will have somewhere between two and four fields available where you can enter information regarding database updates.
These are:- Default Stats Code – This keeps a record of the number of times this report is run.
- Default Detail Stats Code – This a record of the number of items associated with the report.
- Update History (Y/N) – If set to Y, this puts a record of the report in the Borrower History (or Stockitem History).
- Update Entity (Y/N) – Setting this to Y allows further changes to be made, i.e. financial accounts or status updates.

For the Stats Codes, you need to enter in a Code as specified in the Statistics Codes screen (Main > Supervisor > StatsParams):
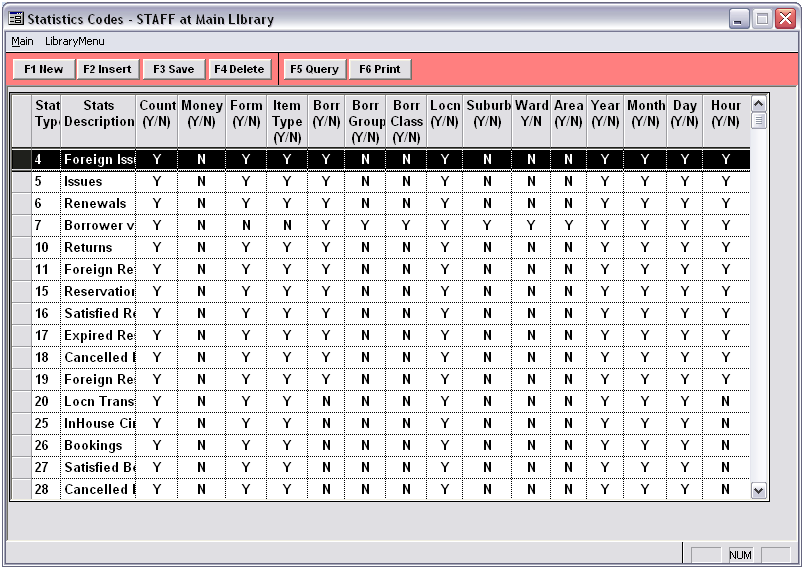
This will count the report information as part of your statistics. The Update fields just require a Y (for Yes) or N (for No) value.
Note: In RepAddNew you can give a template default settings for the above four items, but you can also change these individually next to each report later.
- After you have altered your information in RepAddNew for the template defaults, go back into the main screen for your reports – for example: Application > RepCirculation if you are running an overdue report.
- If you haven’t set up your report yet, click the F1 New button – the Select Report Format screen will display:
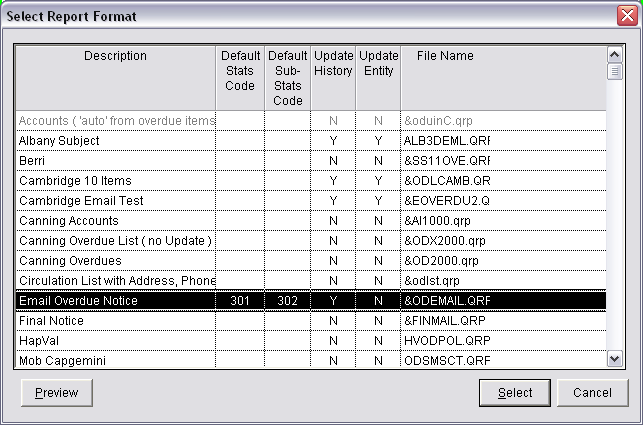
- Highlight the template to be used and click the Select button.
- When you select your template, a new line will appear in your Report screen where you can edit the four items from Modify Report File screen, as well as give it a meaningful Description so you’ll know what it is the next time you see it (for email reports, this will appear in the Subject Line of the email).
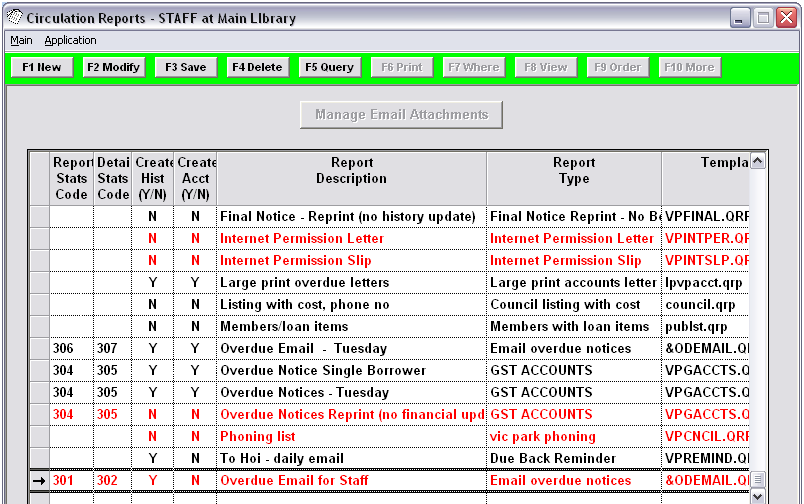
- After you’ve changed your items, click the F3 Save button to save your report (if you already had your report set up, you can just click in any of the fields to edit the information and then click the F3 Save button).
If you haven't done so already, you will need to set up your Where statement in order to obtain the correct information. - To check/setup your Where statement, click the F7 Where button – the Reports – Where screen will display:
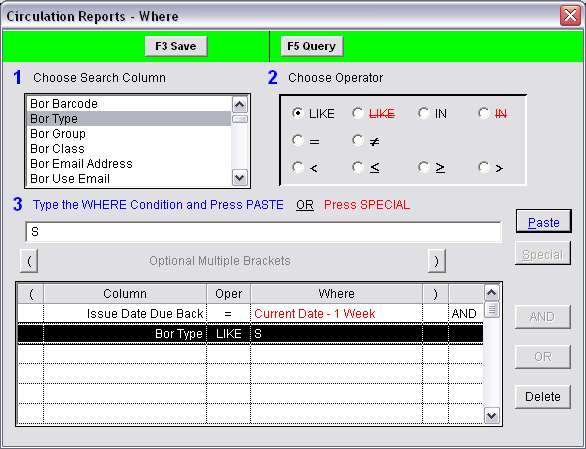
Note: For more information on creating Where statements, please check out our Where training manual on the Content Portal.
- When your Where statement is set up to find the correct information, you can click the F3 Save button to get out of that screen and check F10 More to ensure that it’s going to apply the appropriate changes within the database.
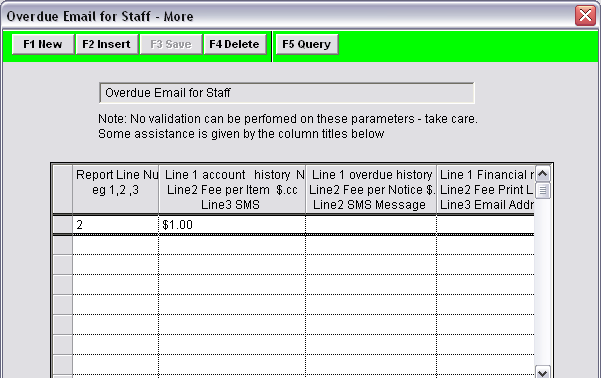
Note: For more information on using F10 More, please check out our “How To” guides on the Content Portal.
- You can close out of that screen once you’ve verified that everything is correct. Now you know your report is going to affect all the changes you wish, it’s time to schedule it to run.
Step 3: Schedule the report
With your report highlighted, click the F6 Print button – the Print screen will display, where you can select from the following options:
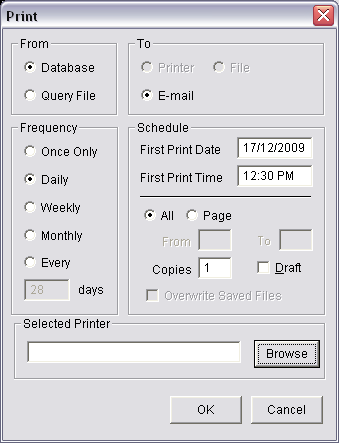
- Where to print From:
- Database (to search the entire database)
- Query File (if you have a saved file of patrons/items you wish to use)
- What to print To:
- Printer (for hardcopy items such as letters)
- File (if this is a document you plan to edit)
- Email (to email it to patrons)
- Frequency:
- Once Only (if this is the only time you’re going to print this report)
- Daily (if you plan to send it every day)
- Weekly (if this is a once a week item)
- Monthly (if this is to be printed every calendar month)
- Every ___ days (if you want to set a specific schedule)
- Schedule:
- First Print Date (the day you want this report to begin its schedule)
- First Print Time (specifies the exact minutes the report will run)
- Selected Printer:
- You can specify any active printer on the network to print to – including virtual printer drivers such as a third party software that allows you to print to PDF (for example: CutePDF Writer)
- Once you have selected all of your settings, you can click OK.
Step 4: Check print progress
- You can check the progress of your reports at any time by going into Main > Reports > RepPrintProgress.
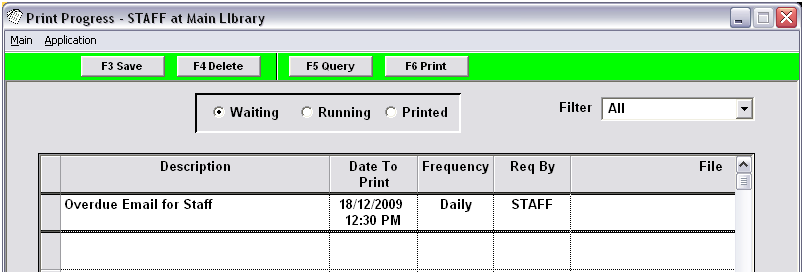
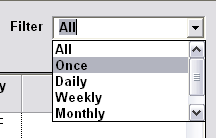
- If your library uses the Report Scheduler for a lot of reports, you can select a frequency type from the Filter drop-down menu at the top.
- You can also click through the three tab options at the top to see the ones that are Waiting, Running, or have already been Printed.
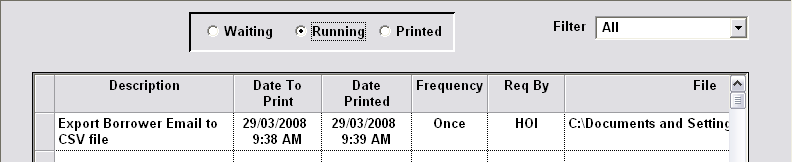
- Your report will show up in Printed when it is complete.
