Configure audit records
Overview
There are multiple elements that can be configured in the Audit Record for each request.
Some of the configuration options are applicable for the display only to patrons and other libraries (NOT to staff).
Note: In Relais D2D and in shared Relais ILL systems all members must agree on the text to display.
Configuring which columns to hide (if any) can be configured separately for the web forms used by patrons and other libraries from those used by staff.
For example, hide the User column (that displays the staff Login ID).


This applies only to web forms used by patrons and other libraries. Rows are not hidden to staff.
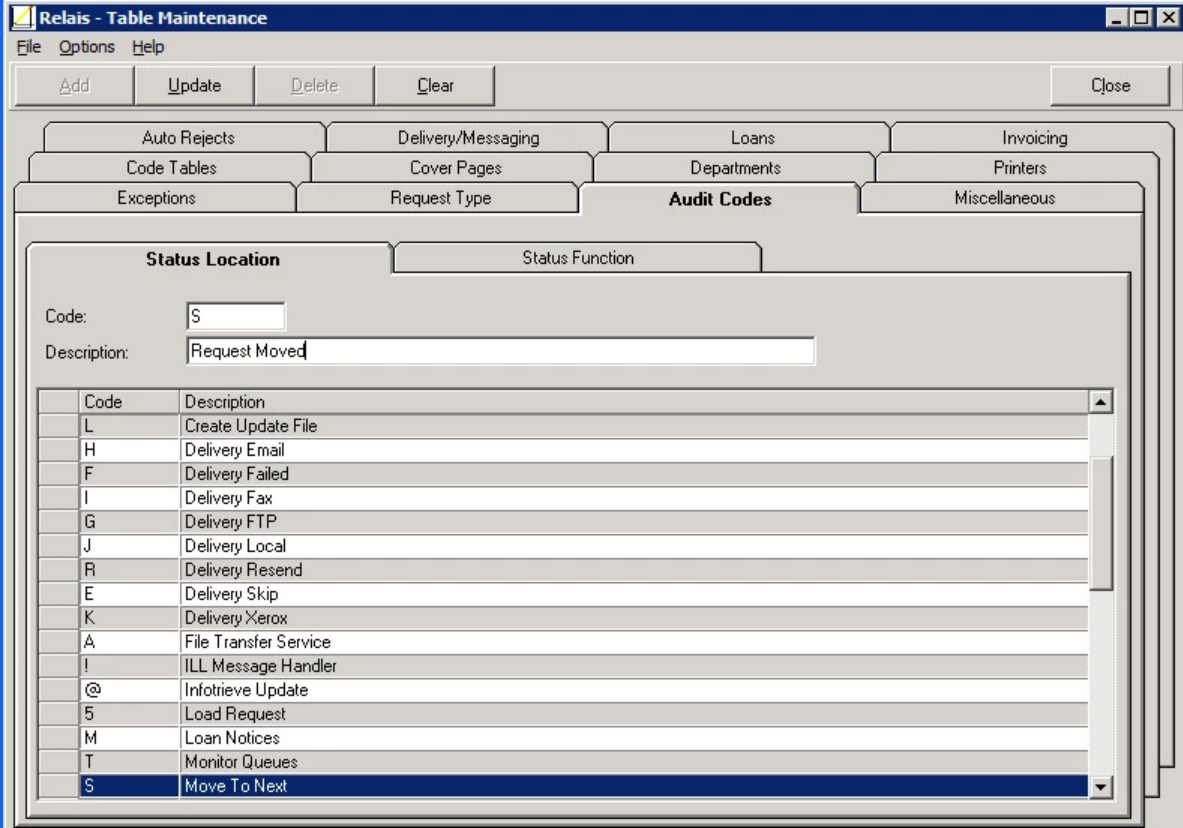
Modify the text of the location
For example to change the text of the Location 'Move To Next'

to 'Request Moved'.

Modify the text of the function
For example change the text of the Function 'Delivered'

to 'Sent'.

Modify the text of the Note
To modify the text in the Note column, submit a Configuration Change incident to Support Centre Plus. Provide details of the row to be changed and the text to be changed. This modification is made by Relais International staff.
Hide columns in audit records
Note: Customers using the Relais Hosted Service should contact OCLC Support - indicate which column(s) in the audit record to hide.
To hide specific columns, for example the User column, in the audit records that display to patrons and libraries using the web forms and to staff:
- Open the relaisweb.ini
- Go to the following lines from the [RequestStatus Table Settings] section
- To hide from patrons and other libraries:
- the Date/Time Stamp column, set DateEnabled=N
- the Location column, set LocationEnabled=N
- the Function column, set FunctionEnabled=N
- the User column, set UserEnabled=N
- the Message column, set MessageEnabled=N
- the Note column, set NoteEnabled=N
- To hide from staff:
- the Date/Time Stamp column, set System_DateEnabled=N
- the Location column, set System_LocationEnabled=N
- the Function column, set System_FunctionEnabled=N
- the User column, set System_UserEnabled=N
- the Message column, set System_MessageEnabled=N
- the Note column, set System_NoteEnabled=N
- To hide from patrons and other libraries:
- By default all columns display.
- Save the relaisweb.ini
- The changes are seen the next time a user logs in.
Example 1 - Hide the User column
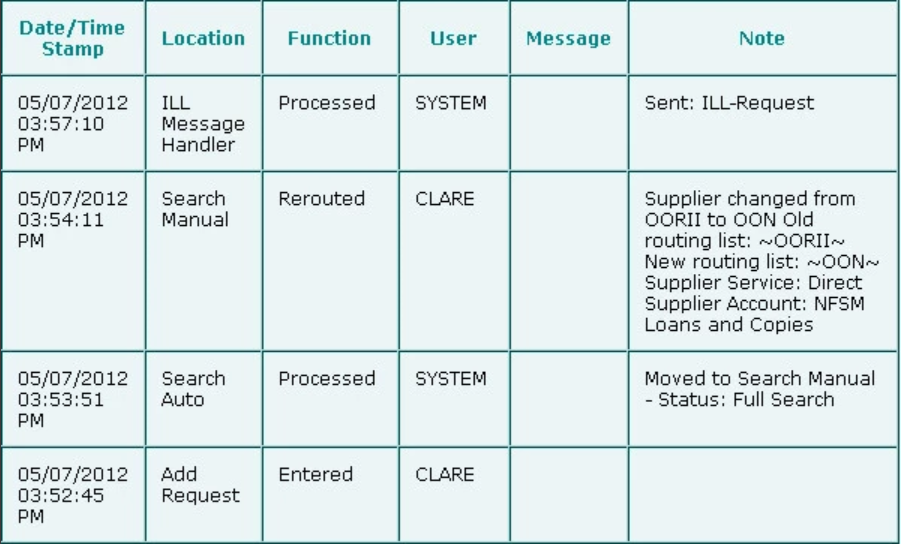
The following shows the default version of the audit record, all columns are displayed.
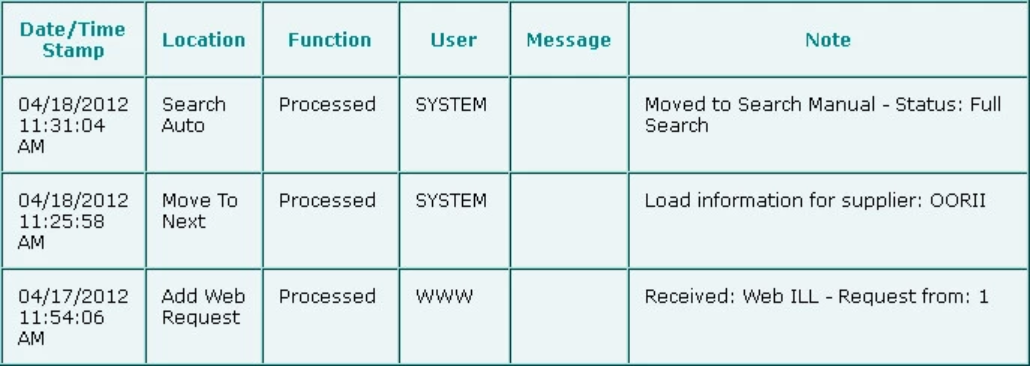
To hide the User column update the following lines from the [RequestStatus Table Settings] section to:
System_DateEnabled=Y
System_LocationEnabled=Y
System_FunctionEnabled=Y
System_UserEnabled=N
System_MessageEnabled=Y
System_NoteEnabled=Y
Save the relaisweb.ini
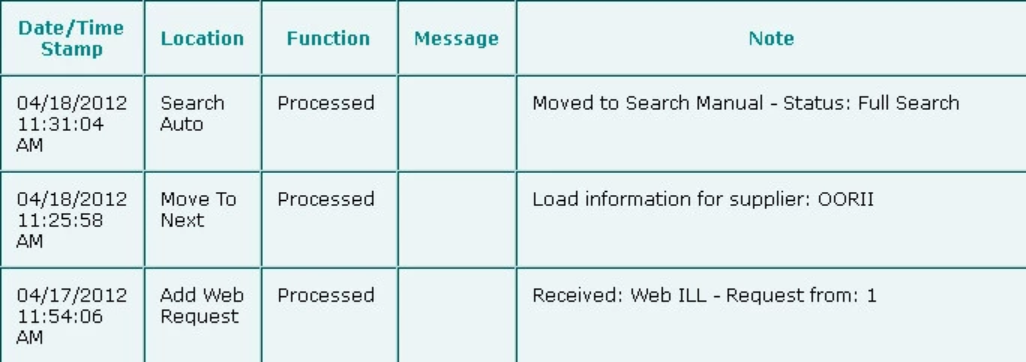
The next time a user (staff, patron or another library) logs in the audit record is displayed as:
Hide entries in audit records
The Function associated with an entry in the audit record determines whether or not it is displayed to patrons and other libraries using the web forms.
While all entries may be of interest and value to staff (whether using the Windows Login or the staff web) it is probable that you want to hide some of these entries from requesters - the level of detail may not be appropriate or may be confusing to them.
To hide specific entries:
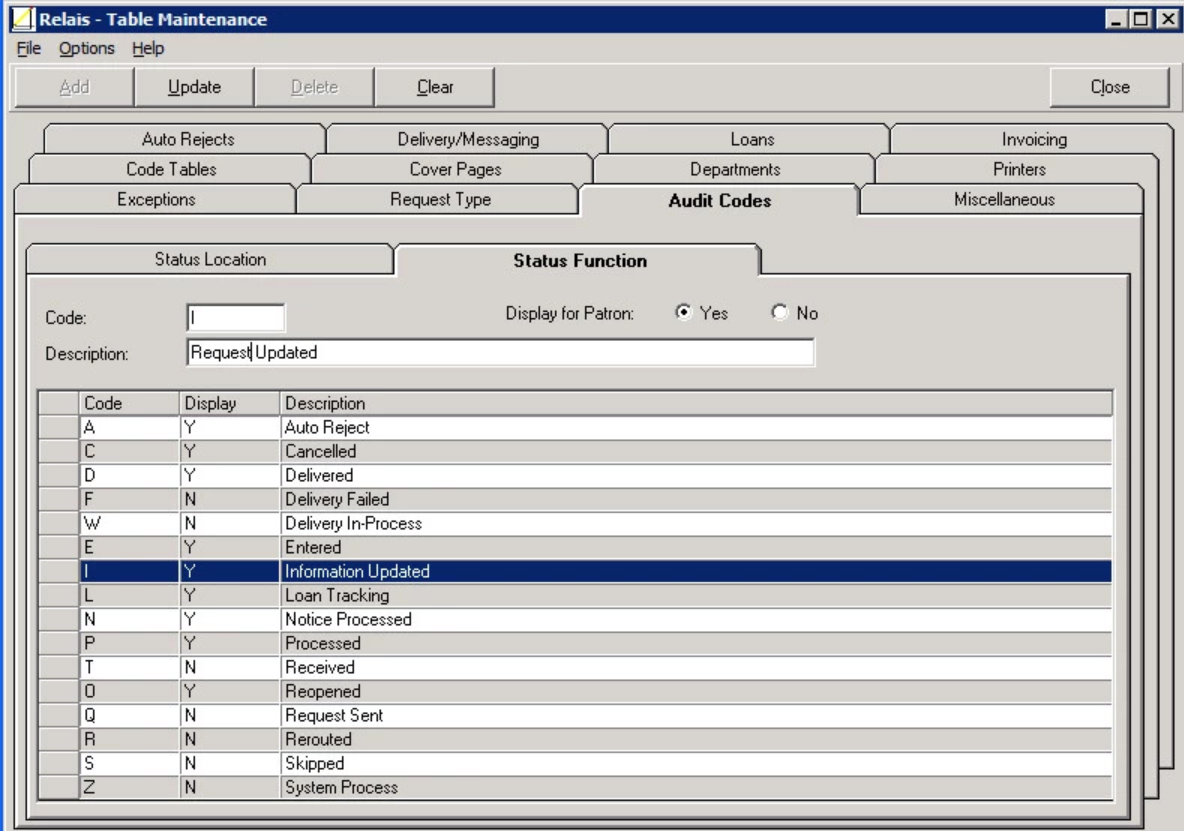
- Login to Table Maintenance.
- Select the Audit Codes tab.
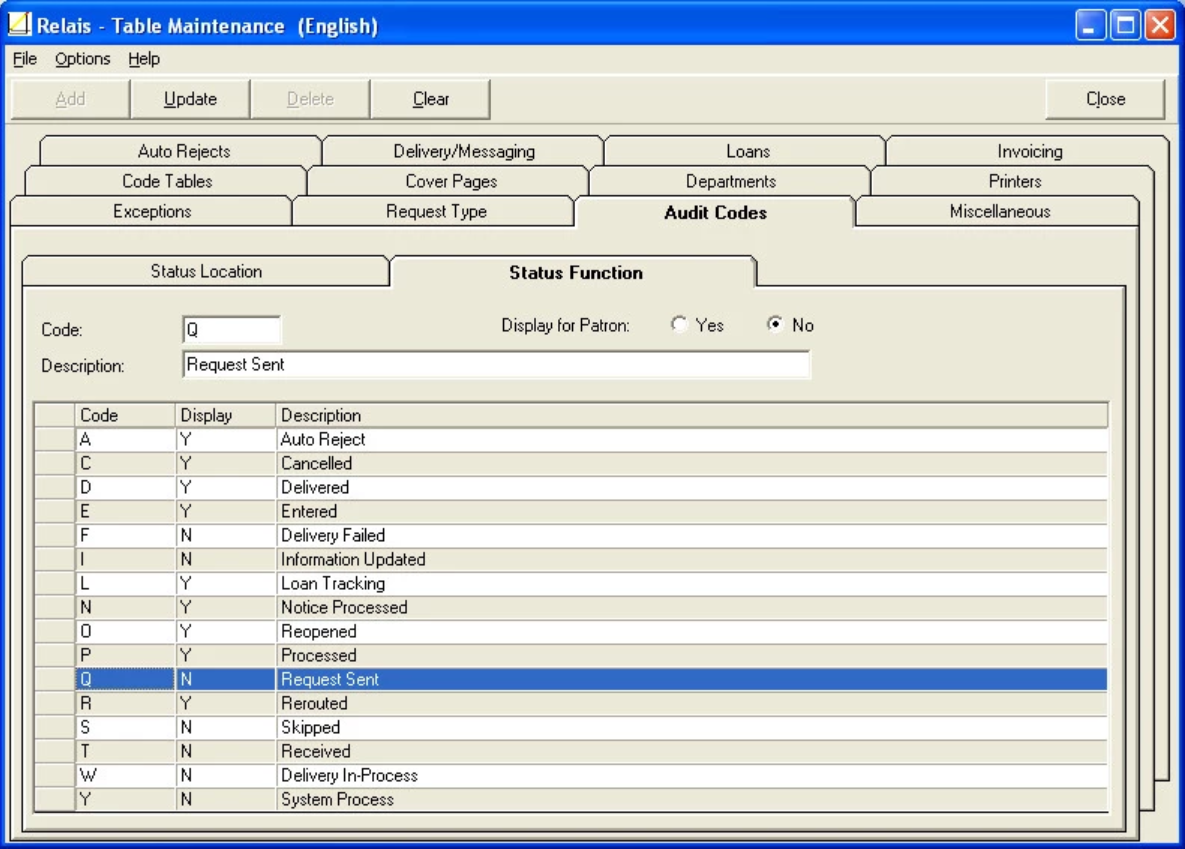
- Select the Status Function tab.
- Highlight the function that you want to hide.
- Select Display for Patron = No.
- Click Update.
- Close Table Maintenance. The corresponding row is hidden the next time a patron or another library looks at the audit record for a request.
Example 1 - Hide the Request Sent entries
By default all entries for an audit record are displayed to staff.

To hide the Borrowing Request / Request Sent entry from patrons and other libraries
- Login to Table Maintenance.
- Select the Audit Codes tab.
- Select the Status Function tab.
- Highlight the row corresponding to Request Sent.
- Select Display for Patron = No.
- Click Update.
- Close Table Maintenance. The corresponding row is hidden the next time a patron or another libraries looks at the audit record for a request.
Note: A status function may be used in multiple places. If it is hidden as described above all entries with the function will be hidden. Contact OCLC Support if you want to hide specific occurrences of a status function but not others.
Modify the text of the function
To modify the text of the function:
- Login to Table Maintenance.
- Select the Audit Codes tab.
- Select the Status Function tab.
- Highlight the function that you want to modify.
- Change the Description.
- Click Update.
- Close Table Maintenance. The text is modified the next time staff, a patron or another library looks at the audit record for a request.
Modify the text of the location
Caution: This changes the text for all requests in the system.
To modify the text of the location:
- Login to Table Maintenance.
- Select the Audit Codes tab.
- Select the Status Location tab.
- Highlight the Location that you want to modify.
- Change the Description.
- Click Update.
- Close Table Maintenance. The text is modified the next time staff, a patron or another library looks at the audit record for a request.
